Whether you’re a seasoned DIY expert or just starting, hanging drywall can be easy and rewarding. Learn best practices to get the job done right.
This updated third edition shows readers how to hang, tape, and finish drywall walls and ceilings. Proven installation techniques and specialized tips from professional drywall Painting Contractors are used.
What is Drywall?
Drywall is the building material that most commonly covers walls and ceilings in homes, apartments, and commercial buildings. It is primarily made of calcium sulfate dehydrate (or gypsum). It’s also the main ingredient in fertilizer, school blackboards, and sidewalk chalk.
Gypsum drywall is available in several varieties, each offering a unique purpose and price point. The most common thickness is 1/2-inch drywall, which works well for new construction or wall repair. Three-eighths-inch drywall is slightly thicker and can work for curved wall surfaces, while one-inch drywall is generally used for trim applications by professional painting contractors.
When cutting drywall, permanently mark the intended dimensions with a square and then use a utility knife to score the wallboard. This is done with the white side of the drywall facing up and allows for a smooth, even score line. The drywall will snap cleanly along the scored line using this method when pressure is applied. Try to hang full sheets rather than partial ones whenever possible, as it will save you time and effort with taping.
Preparation
Drywall is an inescapable part of building a home, whether new construction or remodeling an existing space. It requires a certain skill level and finesse from a professional Painting Contractors Seattle, but it is not an impossible project for the average DIYer. Taking on the task and seeing your efforts reflected in a finished room can be gratifying.
Before any drywall can be installed, planning out the space and scrutinizing the framing is essential. To ensure a professional-quality finish and avoid any mistakes, it’s important to follow these guidelines.
For example, you should use a level or straight board to check that all of the studs and joists are in a straight line. If any are not, they should be adjusted with a hand saw or power planer before you begin hanging drywall. Additionally, it’s essential to ensure that no seam lines up with a window or door opening frame. Doing so will make spackling more difficult down the road.
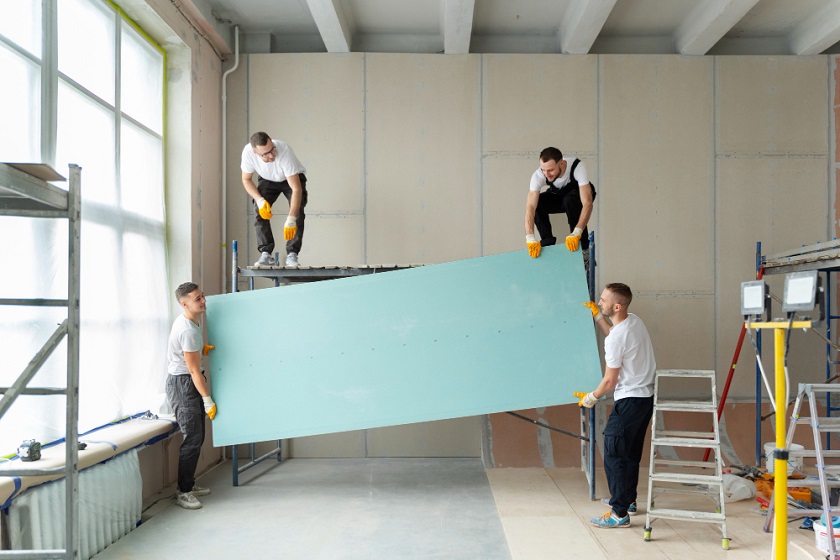
Hanging the Drywall
Hanging Drywall—also known as gypsum board, green board, wallboard, or Sheetrock, the brand name of this material—requires some DIY skills but is a doable project for most homeowners looking to remodel an entire room or update a specialized space. To minimize the time it takes to complete your drywall installation, be precise in your measurements and placement. It will pay off in less corrective work later on.
Inspect the framing to ensure the studs are lined up in a straight plane for remodels. If they are not, you can fill low spots with shims or install a joist hanger.
First, measure the length of your drywall sheet using a tape measure and a T-square or any other straight edge. Then, draw a straight line on the drywall sheet that matches the measurement. Score the front of the drywall sheet along the drawn line using a utility knife. This will help you to break the sheet along the scored line easily. If you apply enough pressure, the drywall will snap along the scored line, making it easier to cut to size with tin snips or a utility knife.
Finishing
Since its introduction during the 1940s, drywall has become commonplace as a building material. It has many advantages over lath and plaster, including lower cost and a more forgiving structure that can be hung by a homeowner with essential tools.
While hanging drywall may seem daunting for a first-time home renovator, the process is pretty simple. The steps that follow — mudding, taping, and sanding — are where you’ll need a little more finesse, and this is the phase where it’s worth hiring a professional.
Before you start on the next phase:
- Mix your mud to a peanut butter texture (not too thick).
- Use a large putty knife to apply a thin coat of joint compound over your taped seams and corners.
- Allow the first coat to dry according to the directions on the mud can, and sand it lightly between compound applications.
- Before you finish, check the wall for protruding screw heads that need to be set.